Quickstarting a Spring Boot project
Spring Boot is a way of building stand-alone Java applications. These applications can embed web servers, schedulers and so on, so they don't need to be deployed on app servers. Instead, they run from the command line and can start up or attach to whatever they need to run. This works well with the 12 Factor methodology, which encourages building scalable, more maintainable applications. We'll look at this a bit more in posts.
The Spring Boot project provides a lot of starter projects to get you up and running, and you can use these to quickly add the features you need to your application. This is fantastic for prototyping or quickly getting an application up and running. There are lots of ways to get started. There's a Spring Boot command line, Eclipse and other IDE plugins, and a website, https://start.spring.io/, that can build a project for you.
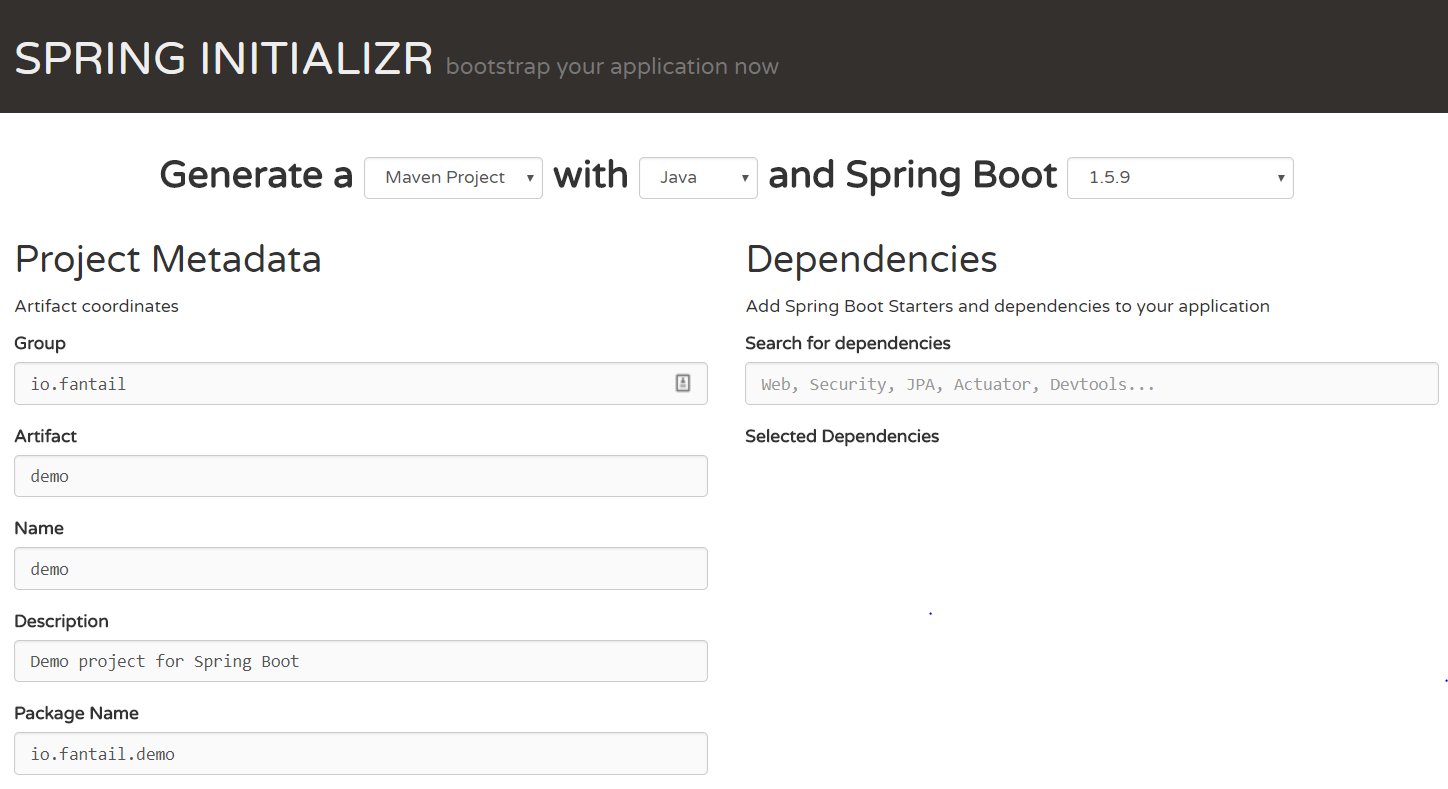 The Spring Initializr lets you select the features you want your project to have, then download a template that you can customize to add your special sauce too. The screenshot above shows some of the advanced options, you can specify. Feel free to use the simple version - this wizard produces text files, so anything you leave out or want to change in the future, you can.
The Dependencies text field auto-completes some of the options you can select. I'm going to create a Jersey REST API in this demo, with persistence into a PostgreSQL database. You can look at the checkboxes in the advanced settings page, selecting what you want or just type Jersey, JPA and Postgres into the form and you're ready to go!
 When you've selected, go ahead and press the Generate Project button. You'll get a Zip file to download containing the source code:

OK, so there's only the application there - no service or persistence layer - but if you check the POM file, there's everything set up and ready to go:

Unfortunately, the project won't run straight away. The PostgreSQL database needs some configuration. Add the following to the application.properties file:
I added the database to match. You can now run your application:
mvn spring-boot:run
You'll get a lot of output, but the last lines should be:
If you see the "Tomcat is started on port(s): 8080 http" line, then everything worked - going back through the logs, the application initialized JPA, connected to Postgres, and finally started a web server (Tomcat) on port 8080. You can browse to http://localhost:8080/ and check it out. You'll get a 404 error because nothing is set up to respond to that URL just yet, but at least the web server is working!
Next up, adding a REST resource.
The Spring Boot project provides a lot of starter projects to get you up and running, and you can use these to quickly add the features you need to your application. This is fantastic for prototyping or quickly getting an application up and running. There are lots of ways to get started. There's a Spring Boot command line, Eclipse and other IDE plugins, and a website, https://start.spring.io/, that can build a project for you.
The Dependencies text field auto-completes some of the options you can select. I'm going to create a Jersey REST API in this demo, with persistence into a PostgreSQL database. You can look at the checkboxes in the advanced settings page, selecting what you want or just type Jersey, JPA and Postgres into the form and you're ready to go!
OK, so there's only the application there - no service or persistence layer - but if you check the POM file, there's everything set up and ready to go:
Unfortunately, the project won't run straight away. The PostgreSQL database needs some configuration. Add the following to the application.properties file:
I added the database to match. You can now run your application:
mvn spring-boot:run
You'll get a lot of output, but the last lines should be:
If you see the "Tomcat is started on port(s): 8080 http" line, then everything worked - going back through the logs, the application initialized JPA, connected to Postgres, and finally started a web server (Tomcat) on port 8080. You can browse to http://localhost:8080/ and check it out. You'll get a 404 error because nothing is set up to respond to that URL just yet, but at least the web server is working!
Next up, adding a REST resource.


Comments
Post a Comment